How to Set Rivets

Rivets are used in a variety of home repair, hobby, and craft applications to fasten thin materials together permanently. A rivet forms a connection when the shaft end of the rivet is deformed to hold it in place. Some rivets can be set by hand, while others require a rivet gun. While setting rivets by hand is a fairly easy operation, it's necessary to gather the right tools and safety equipment to do the job right.
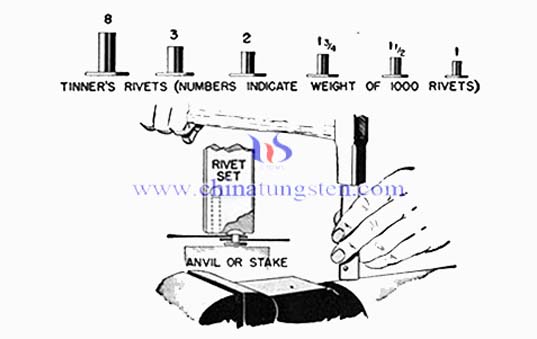
1.Prepare the materials to be fastened by drilling a hole through all layers using the drill and drill bit or by using a punch, depending on the material. Steel or aluminum will require a drill bit, while fabrics and leathers will require a punch. Choose a drill bit or punch size that is the same diameter as the rivet shaft. Choose a rivet depth that matches the total thickness of the materials to be fastened. If the rivet is too long, it will not compress enough and the materials will be free to move. If the rivet is too short, it will not grasp the materials enough and it could pull out of the assembly.
2. Insert the rivet through the drilled or punched holes so that the shaft passes through all of the layers.
3. Place the assembly down on the rivet setting pad, with the end of the shaft oriented upwards. The tip of the rivet should be centered on the cone of the setting pad, so that the sides of the shaft can flare out when the rivet is struck.
4. While wearing safety glasses, hit the head of the rivet squarely with the hammer. 5. Turn the assembly over and examine the end of the rivet. The edges should have flared out away from the center, and the material should be fully compressed between the end of the rivet and the head. Repeat Step 4 if the rivet is not fully compressed.


